Making a wooden box
Hand crafted at Perth Wood School.
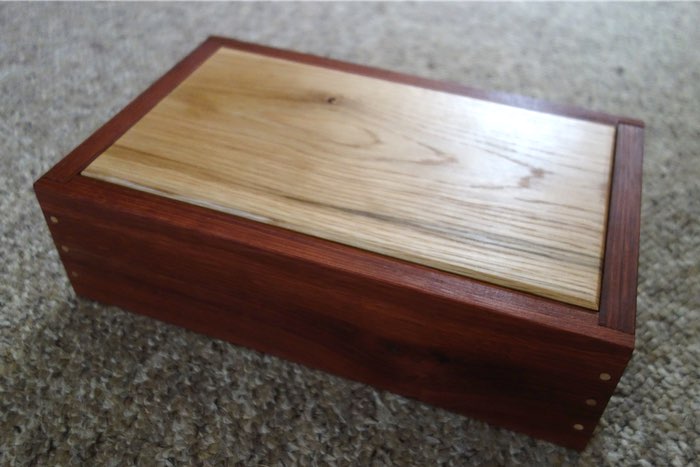
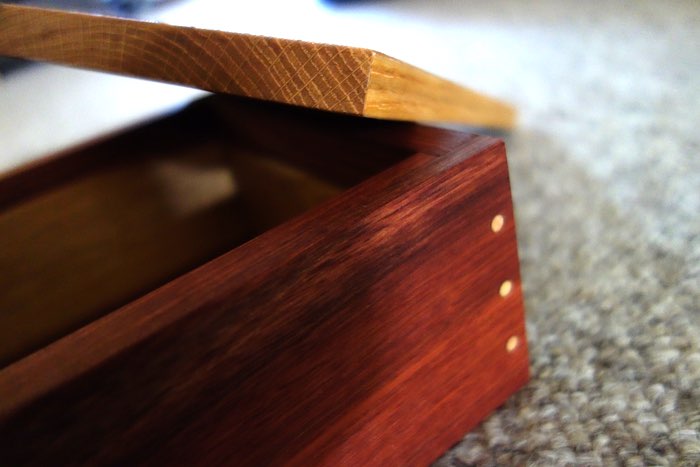
I made a box! And not a shit one like last year's either. This one is made of jarrah and American white ash. And I used proper tools like a jointer, a router, an orbital sander, and Japanese wood nails. And finished it with tung oil.
It looks real pro, guys. Just like a bought one. :)
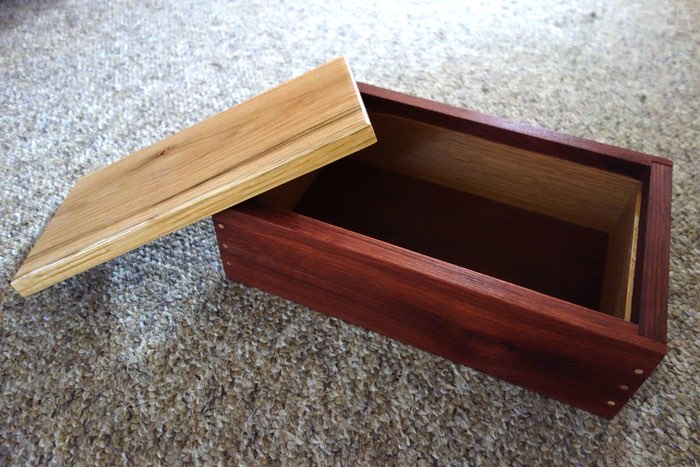
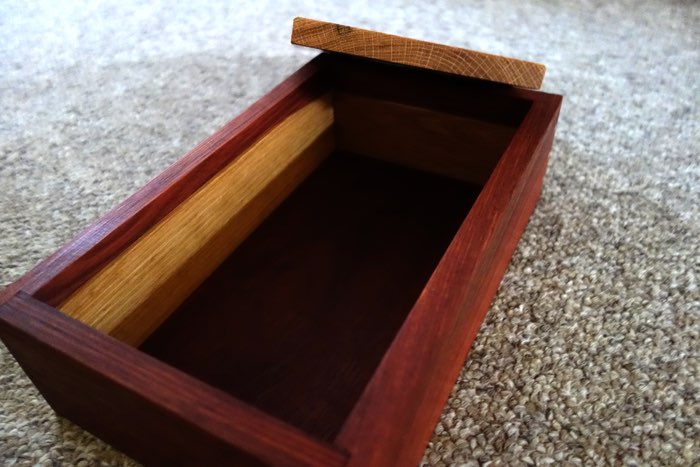
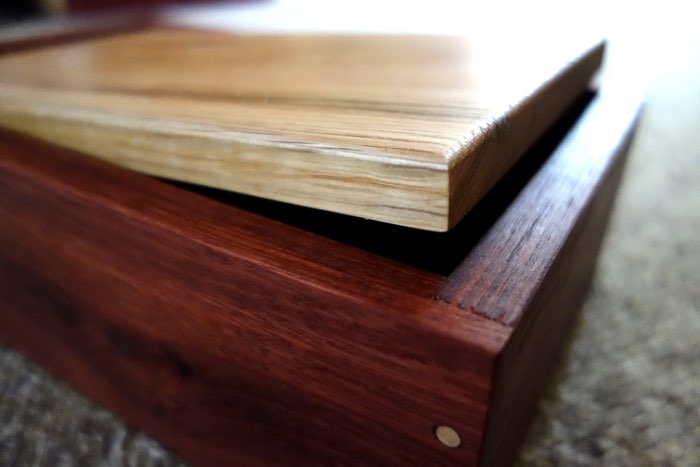
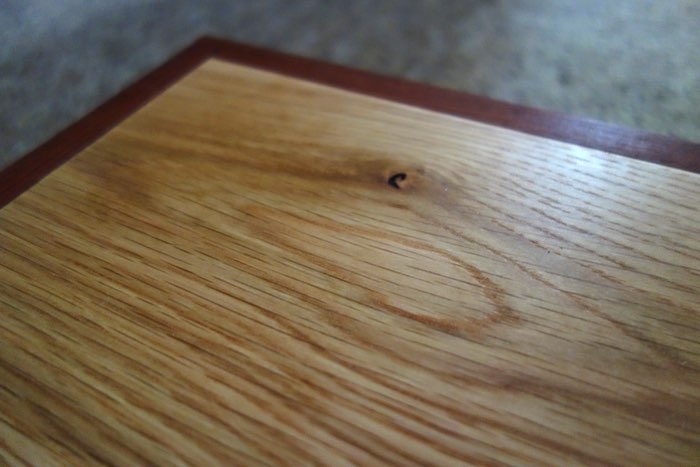
The inner lining has a slant cut into it, so you push the lid down to see-saw the other end open. It's a cleverly designed little thing, requiring a range of woodworking skills to make.
All this was done in the Introductory Woodworking course run by Perth Wood School. For just under $300 each, we got high quality instruction in an intimate small group setting, access to awesome tools and, of course, awesome wood.
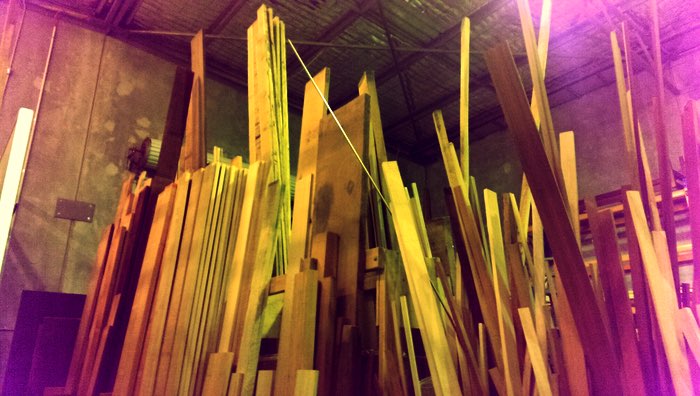
They've got a neat setup at PWS. It's pretty much a big warehouse full of work benches, machines, tools and timber. They run a bunch of classes throughout the year in addition to renting out machine and workspace time.
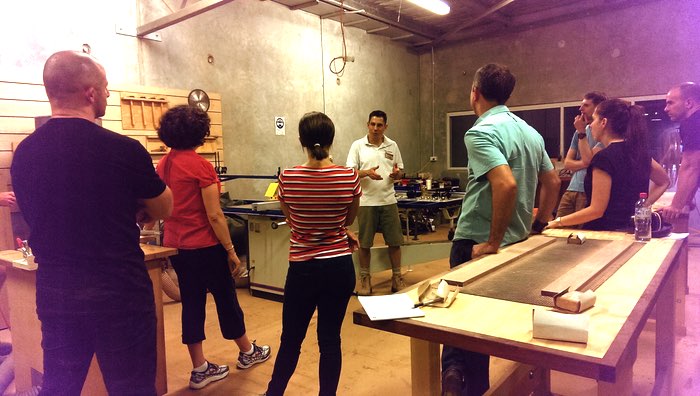
Our tutor, Dave, is an ex-highschool woodwork teacher who wanted to give people an opportunity to pick up woodcraft. You'd think it would be boring to hear some guy talk about wood for an hour, but Dave is a full-on wood nerd and his passion was contagious. I've never wanted to know more about how to identify wood.
So here's what to expect from their 2-part 6-hour Introductory Woodworking course. Sorry for my spy-camera looking photos. One day, I will have a cameraphone that's better with low light.
The first hour covers the safety prologue, a history of the school, and a rundown of popular wood available in Perth. Naturally, you'll be raring to go, but it's worth paying attention here. The story of school and wood helps you appreciate what you're working with. And safety is a must, as woodworking machines can injure soft human bodies in irreversible ways.
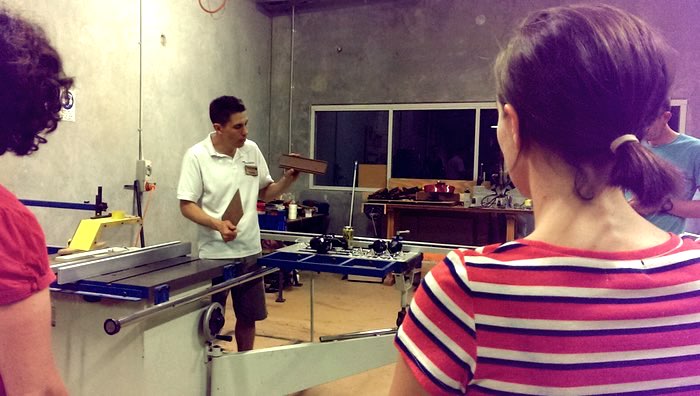
You get stuck in pretty quickly. They show you the box you'll end up making, you go "no way!", they go "yes way" and let you pick a nice plank of jarrah to get started with.
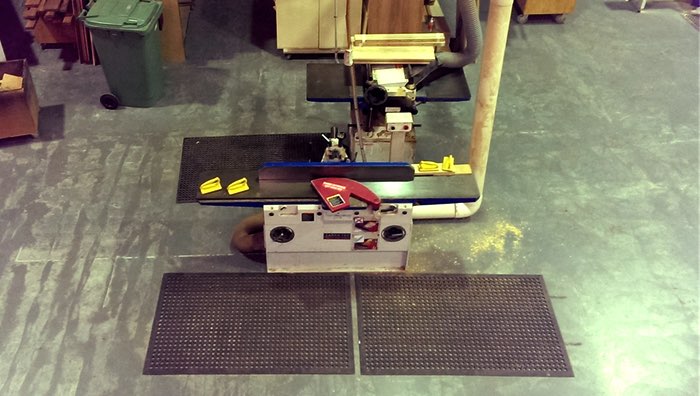
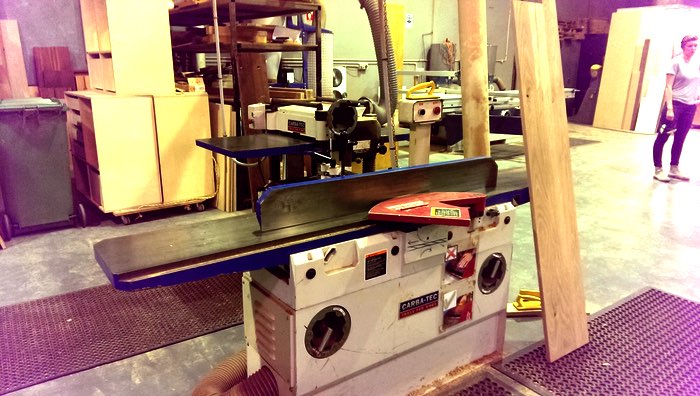
This machine is called a jointer. It shaves your wood to give you a nice flat surface. You run your jarrah through the jointer to ensure it's flat and at the right thickness for your box.
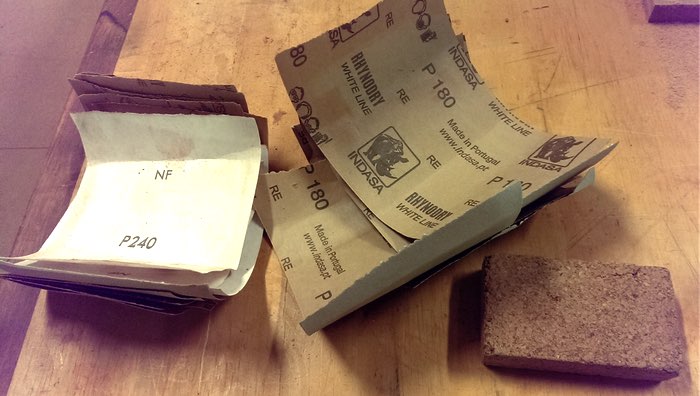
Next, you learn about sanding, and how it's better to use a cork sanding block instead of a piece of wood so your arm doesn't get as sore as quickly. 120-grain smooths out the natural roughness of the wood; 180-grain smooths out the scratches left by the 120-grain; 240-grain gives what's left a lovely sheen.
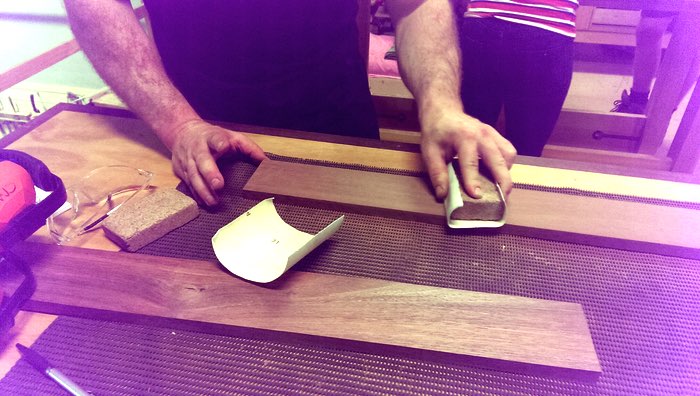
Always sand along the grain, not across the grain - unless you love scratches.
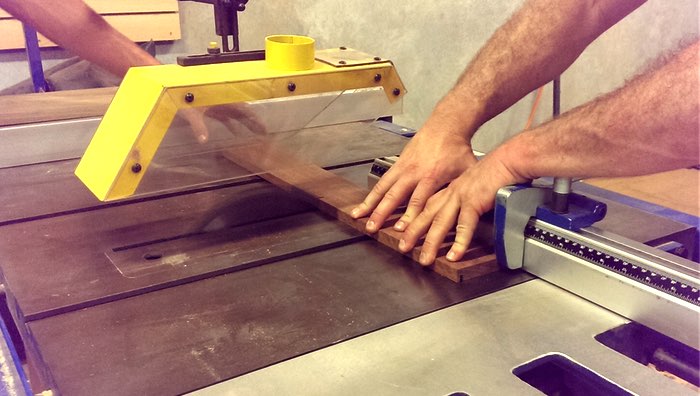
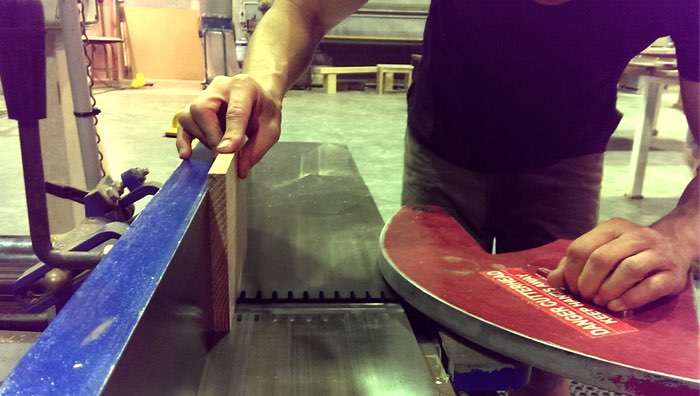
When your plank is nice and smooth, you use a table saw to cut a groove, so you can insert a bottom for your box. The same saw is used to cut the plank into the right sized pieces for assembly.
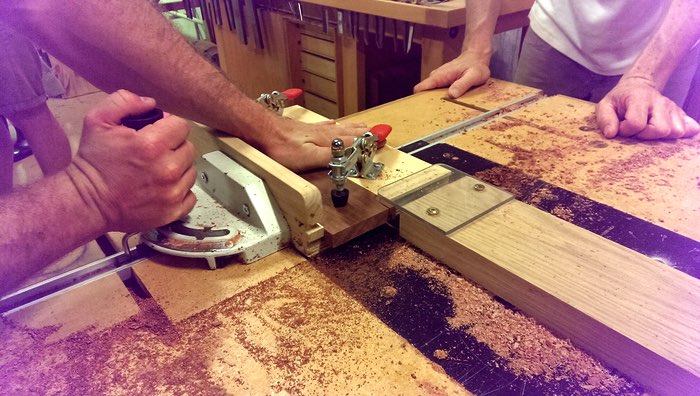
Two of your pieces require a lapped rebate joint, for which you'll use a mounted, inverted router. It is very cool to watch the router at work - it's basically a big, sharp, spinning tooth that chews up the wood as you feed it across.

We were told routers are generally pretty safe until you invert it and mount it to a table. Then it's worth making a holding device (a jig) to keep your hands as far as possible from the spinning tooth.
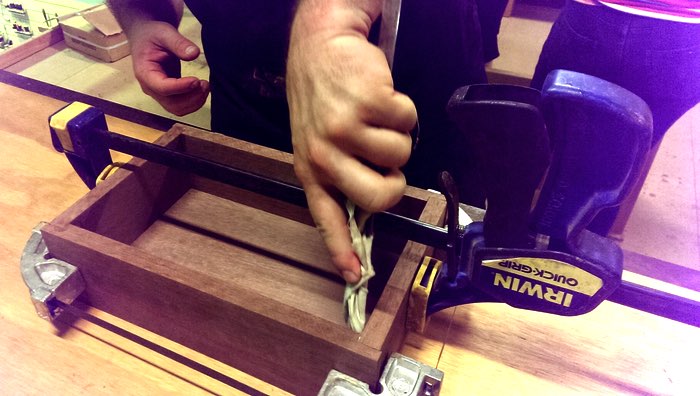
You get a piece of wood veneer for the bottom, and learn about traditional and modern wood glues, and clamping. The first session ends with you cleaning any excess glue off the corners.

By the time you return the following week for the second part of the course, the glue will have dried, and you're ready to finish your box. You jump straight into it, learning how to effectively hold a drill, and insert Japanese wood nails into your work.
Wood nails are so so expensive, but they're so so beautiful. I'm glad we got to use them here. They really give the box some character.
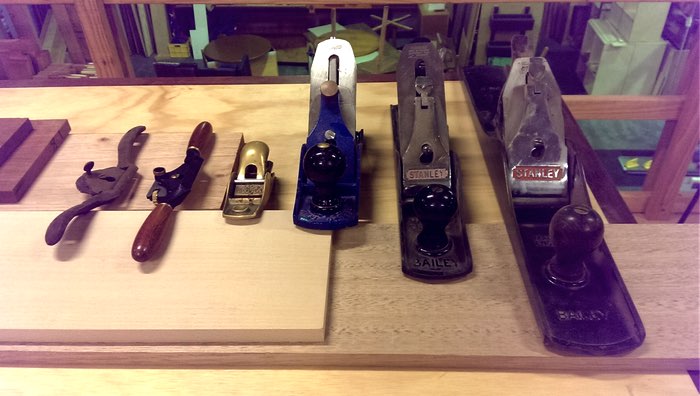
These tools are the hand-powered version of the jointer. Or should I say they're the originals, and the jointer is a motor-powered version.
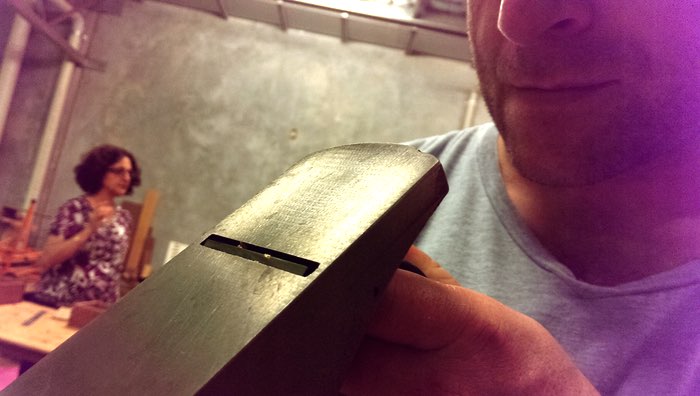
The box's inner lining needs to be carefully hand-shaved to the right shape for allowing the lid to open.
It's hard to describe in words how this works, but when you do it yourself, it'll be plane to see.
^____^
You pick and cut the wood for the lid as well. I was hoping to try out the jointer, but it was just as educational watching Dave do it for us. Probably for the best, as this is one of the most dangerous tools in the workshop. The effect on hands and fingers was described as "pink mist", leaving nothing to sew back on. :\
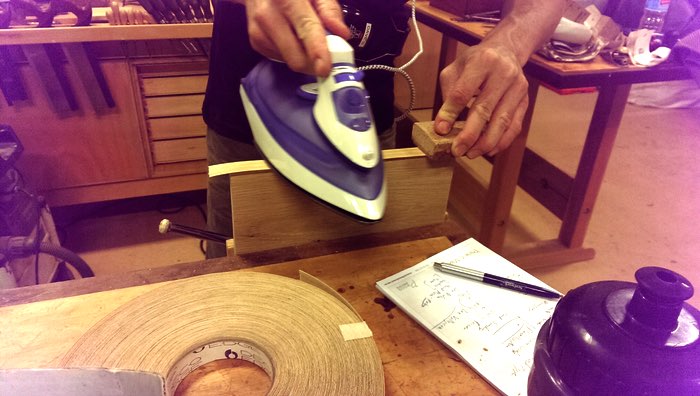
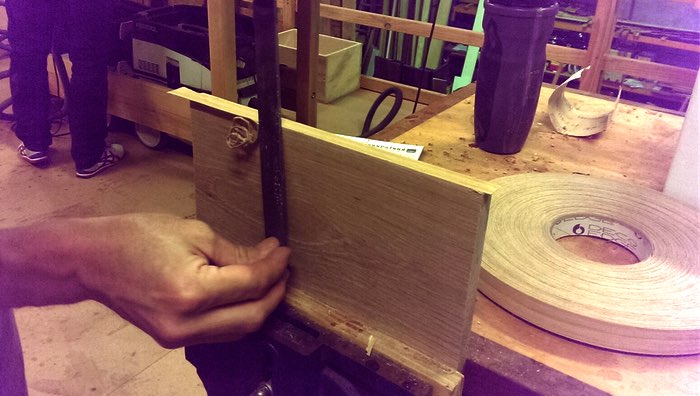
As usual, I was the odd one out for something. I had picked wood that was too small for my box. I guess this was lucky, as I got to learn how to extend a piece of wood.
Dave pulled out a big roll of white ash veneer tape, which came with heat-activated glue on the back. He ironed the tape onto the edge of the lid and trimmed the excess with a chisel.
This blew my mind. It was so simple. I never thought it would be that simple.

Prepping the inner lining and the lid sees you playing with a belt sander, an orbital sander, a mini router, and an air gun.
They really did put a lot of thought into this box, so you'd learn all sorts of basic skills you can use to make more complicated things later. The base of the box itself uses the same blueprint as for a cabinet - they use the same design in their other courses where you make proper furniture.
I hope I haven't spoilered this too much for you. It is worth having a go, even with spoilers, as there's nothing more satisfying than doing it yourself. I feel heaps more confident now about making stuff out of wood. And it's way more interesting than drilling a tree stump. No, I haven't been paid to say this. I bloody well paid for it myself and had a ruddy good time.
If you do go, don't wear nice clothes. You'll be covered in so much dust. Wear closed-toe shoes. Shorts are fine cos it's bloody hot in summer. And remember your fitbit if you have one cos you'll do a lot of stepping. :)